DFM for Injection Molding: Optimize Your Designs for Success
Published: September 23, 2025
Introduction
Table of Contents
This guide is for product designers, engineers, and manufacturers looking to optimize their plastic part designs for injection molding. Design for Manufacturability (DFM) is the engineering practice of designing products so they are easy and cost-effective to manufacture. Applying DFM principles to injection molding can significantly reduce production costs and improve part quality. This guide explains how to apply DFM principles specifically to injection molding projects.
We cover key DFM principles, common mistakes, material selection, and step-by-step implementation for injection molding. DFM for injection molding enhances manufacturing efficiency and drives cost reduction by optimizing designs for production. At 3DDFM, our $75/hr expertise—half US rates—saves 20-30% on tooling and production costs. For example, our Medical Sanitizer unit used Injection Molding DFM to eliminate undercuts, saving thousands. Unlike unoptimized designs, DFM ensures manufacturability as a collaborative process involving product designers, mold designers, and sometimes a product development company to ensure optimal results. Thus, learn DFM in our beginner’s course at 3DDFM Courses or get a free audit at 3ddfm.com!
Why Injection Molding DFM Matters
Injection molding produces precise plastic parts, but poor design inflates costs. Specifically, DFM minimizes waste, improves production efficiency, and streamlines the manufacturing process while enhancing part quality. For instance, optimizing wall thickness can cut material costs by 15-25%. Consequently, DFM streamlines production, ensuring parts meet tolerances while lowering expenses. 3DDFM’s 30+ years of expertise helps startups and established companies reduce overall manufacturing costs and achieve scalable, affordable designs.
Transitioning from the importance of DFM, let’s explore the key considerations that guide successful injection molding design and how mold flow analysis supports these efforts.
Key Considerations for Injection Molding Design and Mold Flow Analysis
DFM principles guide the design of parts for injection molding, while mold flow analysis is a tool used within DFM to predict and optimize how material fills the mold. Mold flow analysis is a simulation process that models the flow of molten plastic into a mold, helping designers identify potential issues such as air traps, weld lines, or incomplete filling before physical molds are made. This proactive approach ensures manufacturability and reduces costly revisions.
Injection Molding DFM addresses critical design factors to ensure manufacturability, with a focus on optimizing part geometry for manufacturability. Here are five key considerations, answering the Google top question, “What are the key considerations for injection molding design?”:
Uniform Wall Thickness: Consistent walls (1.5-3mm) prevent warping and reduce cooling times, saving 10-20% on cycle costs, per LINK5. Designing for uniform wall thicknesses is crucial to ensure even material flow and prevent defects such as sink marks in the molded product.
Draft Angles: Adding 0.5-3° angles ensures easy part ejection, cutting mold wear by 30%.
Undercut Elimination: Snap-fits or side-actions replace undercuts, reducing tooling complexity and costs by 20-25%.
Material Selection: Choosing resins like ABS or PP balances strength and cost, avoiding expensive reworks.
Tolerances: Tight but achievable tolerances (e.g., ±0.1mm) ensure quality and maintain structural integrity in the molded product without overcomplicating molds.
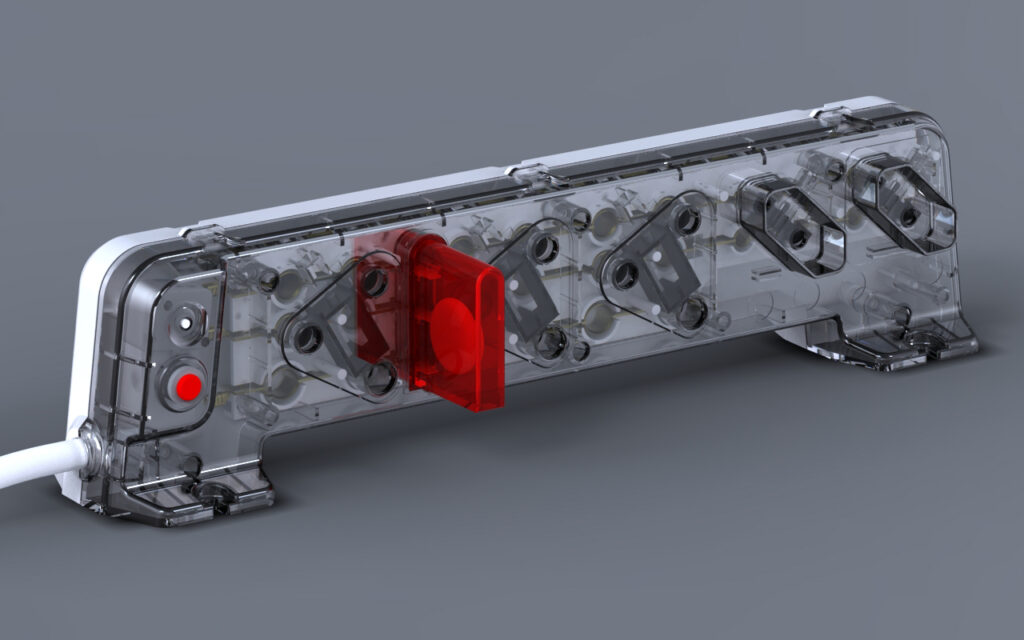
For example, our Electronics Covers animation shows uniform walls and draft angles in action. Thus, DFM ensures cost-effective, high-quality parts. Proper control of material flow during injection molding is essential for achieving high-quality molded products.
A DFM report is a comprehensive document that evaluates your design for manufacturability, highlighting potential issues and providing actionable recommendations to improve both product and tooling design. This report helps facilitate accurate discussions with customers and mold makers, ensuring all stakeholders are aligned.
Now that we’ve outlined the key considerations, let’s directly address the most common questions about injection molding design.
FAQ: What Are the Key Considerations for Injection Molding Design?
DFM optimizes designs by focusing on uniform wall thickness (1.5-3mm), draft angles (0.5-2°), undercut elimination, material selection (e.g., ABS), and achievable tolerances (±0.1mm). These reduce tooling costs by 20-30% and cycle times by 15-25%, per Industry Insights. For example, our Medical Sanitizer unit avoided $12,000 in costs. Other specific examples include reducing sink marks in consumer electronics housings and improving ejection reliability in automotive connectors through DFM recommendations in the plastic injection molding process. A DFM report provides a deeper understanding of both product and tooling design challenges, enabling more informed decisions and facilitating accurate discussions with customers. Thus, Injection Molding DFM ensures efficient, high-quality production.
Transitioning from these foundational principles, let’s examine how material selection impacts your injection molding project.
Material Selection for Injection Molding
Material selection is a pivotal step in the injection molding process, directly shaping the quality, durability, and cost-effectiveness of your final product. The right plastic material not only ensures that your injection molded parts meet performance requirements, but also streamlines manufacturing and minimizes production costs.
Factors to Consider
When choosing a material for injection molding, consider the specific application and environment your product will face. Factors such as mechanical strength, flexibility, chemical resistance, and thermal stability all play a role in determining the best fit. For example, medical devices may require biocompatible plastics, while automotive components often demand high-impact resistance and heat tolerance.
Application Examples
Production requirements also influence material selection. High-volume runs benefit from materials that flow easily and cool quickly, reducing cycle times and material waste. Additionally, regulatory standards, color matching, and secondary processing needs—like painting or ultrasonic welding—should be evaluated early in the design process.
Collaboration and Analysis Tools
To make an informed decision, collaborate with your mold manufacturer and material suppliers. Leverage mold flow analysis and simulation software to predict how different resins will behave during the injection molding process. This proactive approach helps avoid common defects such as sink marks, weld lines, or warping, and ensures your final product meets both functional and aesthetic goals.
At 3DDFM, our technical expertise guides you through the material selection process, balancing performance, manufacturability, and cost efficiency. By optimizing material choices from the outset, you can accelerate development time, reduce excess material use, and achieve superior results in custom plastic injection molding projects.
With the right material selected, it’s important to avoid common design pitfalls that can undermine your injection molding project.
Common Injection Molding Design Mistakes
Poor design choices derail production. The table below summarizes common mistakes, their impact, and real-world examples:
Mistake | Impact | Example |
|---|---|---|
Inconsistent Wall Thickness | Causes sink marks and longer cooling, increasing costs by 15% | Uneven wall thickness in a housing leads to visible sink marks and warping |
Missing Draft Angles | Leads to part sticking, damaging molds and raising maintenance costs | No draft on a container causes it to stick in the mold, requiring forceful ejection |
Complex Undercuts | Require costly multi-part molds, inflating budgets by 20-30% | Undercuts in a clip design necessitate expensive side-action tooling |
Overly Tight Tolerances | Drive up machining costs without functional benefit | Specifying ±0.01mm where ±0.1mm suffices increases mold cost |
Improper Gate Design | Leads to uneven filling and defects, impacting product quality and manufacturing efficiency | Poor gate placement causes short shots in a cover part |
Poor Parting Line Placement | Causes visual defects like line marks and dimensional inaccuracies | Visible parting line on a cosmetic surface reduces product appeal |
Incorrect Ejector Pin Placement | Results in part damage during ejection and can compromise surface quality | Ejector pins leave marks on a visible face of the product |
For instance, a client’s unoptimized design added $5,000 in tooling costs due to undercuts. Design for Injection Molding, as taught in our course at 3DDFM Courses, avoids these pitfalls.
To avoid these mistakes and optimize your design, follow a structured DFM implementation process.
Steps to Implement Injection Molding DFM to Reduce Production Costs
Implementing Injection Molding DFM requires a structured approach. Follow these steps to ensure your design is optimized for manufacturability and cost efficiency:
Design Review:
Analyze CAD models for uniform walls and draft angles using tools like Fusion 360. Review mold components and conduct a thorough DFM analysis to identify potential manufacturability issues early and improve communication between design and production teams.Prototype Testing:
Use 3D printing to catch issues early, saving 15-20% on revisions.Material Optimization:
Select cost-effective resins with engineers to balance performance and price.Tooling Collaboration:
Work with mold makers to optimize tooling design and mold design, focusing on component layout, cooling channels, and gate placement. This helps reduce tooling cost, ensures efficient mold manufacturing, and streamlines the overall product development cycle.Validation:
Test molds with short runs to ensure scalability and quality.
For example, our Electrical Adapter unit’s DFM process caught a tolerance issue in 48 hours, saving $10,000. Therefore, Injection Molding DFM streamlines production.

With a clear process in place, let’s see how technology can further enhance DFM for injection molding.
Role of Technology in Injection Molding DFM
Specifically, technology enhances Injection Molding DFM. CAD software like SolidWorks simulates mold flow, identifying defects early. Moreover, 3D printing enables rapid prototyping, cutting iteration time by 50%. For instance, our Electronics Covers design used mold flow analysis to optimize gates, reducing cycle time by 15%. A mold flow analysis report provides detailed insights into material flow, injection pressure, and potential issues with complex geometries and intricate details, helping to confirm customer requirements and identify problems early in the process. CNC machining is used for creating precise mold components and maintaining molds, while advanced injection molding techniques—such as overmolding and conformal cooling—enable the production of complex geometries and sophisticated features. Thus, technology ensures cost-effective, high-quality production.
With technology supporting your DFM efforts, let’s look at a real-world example of DFM success.
Case Study: Optimizing a Medical Sanitizer Unit
Our Medical Sanitizer unit showcases Injection Molding DFM success. Initially, the design had complex undercuts and uneven walls, risking $12,000 in extra tooling costs. We applied DFM principles:
Added 1.5° draft angles for easy ejection.
Replaced undercuts with snap-fits, saving 25% on mold costs.
Optimized wall thickness to 2mm, reducing material use by 20%.
Used advanced tool design techniques to form undercuts, such as side actions and lifters, eliminating undercuts without increasing mold complexity.
Side actions are movable components in the mold that slide in from the side to form features like holes or undercuts that cannot be created with the main mold halves. Lifters are angled or moving elements that help release parts with undercuts by lifting them out of the mold during ejection.
These optimizations enabled efficient mass production of large quantities while minimizing production costs. By integrating DFM early in the product development cycle, we shortened the timeline and avoided costly redesigns.
Consequently, the client saved $12,000 and cut production time by 30%. Watch the animation on @3ddfm to see the door mechanism (10mm linear motion, then turning) in action. Learn more in our course at 3DDFM Courses
With this case study in mind, let’s summarize the key steps you can take to apply DFM to your own injection molding projects.
DFM for Injection Molding Checklist
How do I apply DFM to injection molding? Use this checklist to guide your process:
Review design for uniform wall thickness and draft angles.
Eliminate undercuts or use side actions/lifters where necessary.
Select appropriate materials for your application and production volume.
Set achievable tolerances to balance quality and cost.
Collaborate with mold makers and use mold flow analysis to validate your design.
Request a DFM report to identify and address manufacturability issues early.
Prototype and validate your design before full-scale production.
By following these steps, you can ensure your injection molding project is optimized for cost, quality, and scalability.
Conclusion
Injection Molding DFM transforms designs for cost-effective, scalable production. Therefore, partner with BP Nel Consulting for $75/hr expertise to optimize your parts, as shown in our Medical Sanitizer case study. Furthermore, our 30+ years of experience ensures success. Hence, join our beginner’s course at 3DDFM Courses or get a DFM Readiness Assessment!
Manufacturing Engineering Services:
Injection Molding Design
Electronic Enclosure Design
Sheet Metal Design
Design for Manufacturing Consulting