
Summary Table: Key Questions About US Medical Device Development
| Question | Short Answer |
|---|---|
| What is a medical device? | Any instrument, apparatus, implement, machine, or similar article intended for diagnosis, cure, mitigation, treatment, or prevention of disease, as defined by the FDA. |
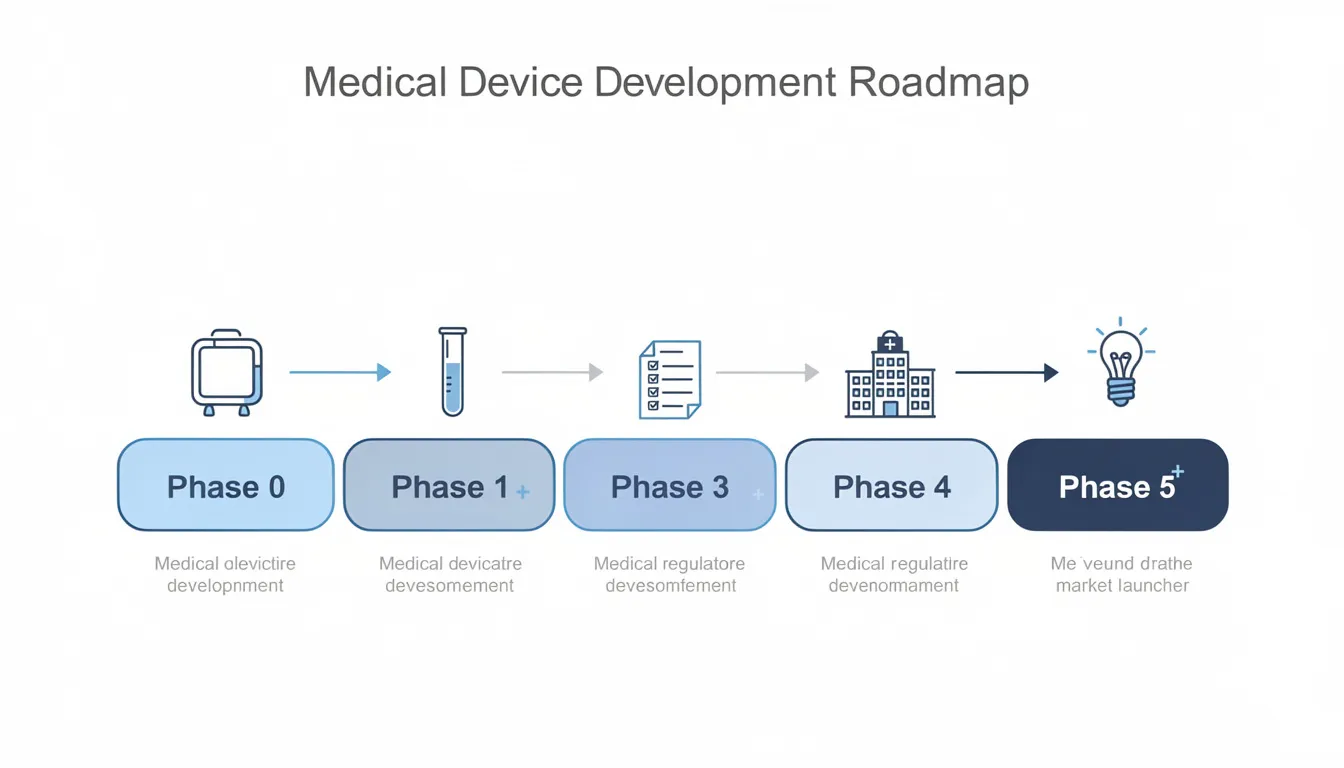
| What are the main phases of development? | Product Definition, Ideation & Conceptualization, Design Development & Engineering, Refinement & Verification, Validation & Manufacturing Transfer, Production & Post-Market Surveillance. |
| How long does it take? | Typically 2–5 years for most devices, longer for more complex products. |
| What does it cost? | $500K–$5M for moderate complexity; higher for advanced devices depending on clinical requirements. |
| What are the main regulatory steps? | Device classification, risk assessment, pathway selection (510(k), De Novo, PMA), submission, and FDA clearance. |
| What is FDA clearance? | Official authorization by the US Food and Drug Administration (FDA) to market a medical device, typically via 510(k), De Novo, or PMA pathways. |
| What is DFM? | Design for Manufacturing: Engineering approach to ensure products are easy and cost-effective to manufacture at scale. |
| What is a DHF? | Design History File: A comprehensive record of the design process, required by FDA for regulatory compliance. |
| What is a URS? | User Requirements Specification: Documented user needs and expectations that guide device design. |
Introduction
Developing medical devices for the US market is a complex, highly regulated process that requires careful planning, technical expertise, and a deep understanding of regulatory requirements. This article is intended for medical device startups, engineering teams, and product managers planning to bring new devices to the US market.
A clear understanding of the US regulatory landscape and development process is critical to avoid costly delays and ensure a successful product launch. This guide focuses on the step-by-step process of developing medical devices, from initial concept through FDA clearance and market launch, providing practical insights, timelines, and examples relevant to anyone navigating this journey.
Statistics tell a sobering story: approximately 80% of medical device development failures stem from poor planning and prototyping in early phases. Meanwhile, development costs average $31 million for moderate complexity devices and can be significantly higher for products requiring extensive clinical trials.
But here’s the good news: teams that follow a disciplined medical device development process—and partner with experienced firms—can compress development timelines by 25-40% while avoiding the most common pitfalls.
This guide walks through each major phase of developing medical devices in the US, from initial concept generation through post-market surveillance. Along the way, you’ll see how expert partners with deep expertise in rapid prototyping and Design for Manufacturing (DFM—an engineering approach to optimize products for efficient, cost-effective manufacturing) help clients bring devices to market faster.
Understanding US Medical Device Classes and Regulatory Pathways
Before diving into the phases, it’s important to understand how devices are classified and the regulatory pathways available for US market entry.
Device Classes and Regulatory Pathways
| Device Class | Risk Level | Typical Regulatory Pathway | Example Devices |
|---|---|---|---|
| Class I | Low | Exempt or 510(k) | Bandages, manual stethoscopes |
| Class II | Moderate | 510(k) | Diagnostic imaging equipment, infusion pumps |
| Class III | High | PMA is closely related to Design for Manufacture in the product development process. | Implantable pacemakers, heart valves |
- 510(k): A premarket submission demonstrating substantial equivalence to a legally marketed device (predicate).
- De Novo: For novel, low-to-moderate risk devices with no predicate; establishes a new device type.
- PMA (Premarket Approval): The most stringent pathway, requiring clinical data for high-risk devices.
Note: Device class determines the regulatory pathway, data requirements, and review timelines. Understanding this relationship is essential for planning your development and submission strategy.
Phase 0 – Product Definition for US Medical Devices
Overview
Phase 0 lays the foundation for the entire development process. The first 3–6 months focus on defining the target user, the clinical problem, and the regulatory pathway. Skipping or rushing this phase often leads to costly redesigns and regulatory delays.
What is a Medical Device?
A medical device is any instrument, apparatus, implement, machine, or similar article intended for use in the diagnosis, cure, mitigation, treatment, or prevention of disease, as defined by the FDA.
Conducting Market Research for US Healthcare
Before sketching a single concept, teams need to understand the clinical landscape. This means:
- Interviewing frontline clinicians (ICU nurses, specialists, ambulatory clinic staff) to map unmet needs
- Analyzing existing technologies and competitor devices currently on the market
- Identifying workflow pain points that existing solutions don’t address
- Evaluating reimbursement pathways including CPT codes and DRG impact
For example, when developing a diagnostic imaging device, your target market might be outpatient clinics needing faster image acquisition. Healthcare professionals in these settings might reveal that current devices are bulky and difficult to operate, limiting patient throughput.
Converting Insights Into Problem Statements
Once you’ve gathered preliminary data, translate those insights into a clear problem statement. Good examples:
| Device Type | Problem Statement |
|---|---|
| Diagnostic Imaging | “Reduce image acquisition time by 50% while maintaining image quality” |
| Infusion Pump | “Improve user interface to reduce medication errors during administration” |
| Implantable Device | “Enhance device longevity to reduce replacement surgeries by 30%” |
Defining Requirements and Risk Profile
This phase should produce several key medical device prototyping deliverables:
- Clinical and business requirements: Target indication, use environment, expected price point
- Device’s classification: Class I, II, or III, based on risk and intended use
- User Requirements Specification (URS): A document that captures the needs and expectations of clinicians, technicians, and patients, guiding the design process.
- Initial risk register: Identifies potential hazards (e.g., device malfunction, user error, biocompatibility issues) and is guided by ISO 14971 risk management principles.
Experienced development partners often enter as early collaborators during this phase, helping translate clinician feedback into initial concept sketches. Their specialized knowledge of US regulatory standards ensures your requirements align with FDA expectations from day one.
Transition: With the product definition established, the next step is to generate and evaluate conceptual solutions in Phase 1.
Phase 1 – Ideation and Conceptualization
Overview
Phase 1 transforms your problem definition into multiple conceptual solutions, typically spanning 1–3 months. The goal is to generate innovative concepts while eliminating impractical approaches early.
Running Collaborative Ideation Workshops
Effective concept generation brings together multiple disciplines:
- Clinicians who understand real-world workflow constraints
- Biomedical engineering experts for technical feasibility
- Industrial designers for form factor and ergonomics
- Human factors specialists for usability considerations
For a diagnostic device, this might mean exploring handheld versus tabletop configurations, different user interface designs, and various sensor technologies.
Creating Low-Fidelity Concepts
Start simple. The design process at this stage involves:
- Hand sketches showing different form factors
- Foam models for testing size and grip
- Simple CAD explorations of major subsystems
- Workflow diagrams showing clinical integration
The key is generating alternatives quickly without over-investing in any single direction.
Rapid Physical Prototyping
Rapid prototyping capabilities enable turning early concepts into physical mock-ups within days—not weeks.
Clinicians can evaluate:
- Handle geometry and reach
- Visibility during procedures
- Ergonomic comfort during extended use
- User-friendly interface placement
Feasibility Checks and Concept Selection
Before advancing concepts, run simple feasibility analyses:
| Device | Key Feasibility Check |
|---|---|
| Diagnostic Device | Sensor sensitivity, power consumption, signal-to-noise ratio |
| Infusion Pump | Flow rate accuracy, battery life, alarm reliability |
| Select 1–2 lead concepts using objective criteria: risk profile, manufacturability, projected BOM cost, and regulatory complexity. Document this decision-making in your Design History File (DHF) to support later regulatory submission. |
Transition: With conceptual solutions selected, the next phase focuses on detailed engineering and design development.
Phase 2 – Design Development and Engineering
Overview
Phase 2 is the “heavy engineering” phase, often spanning 6–18 months. Concepts evolve into detailed, testable designs ready for verification.
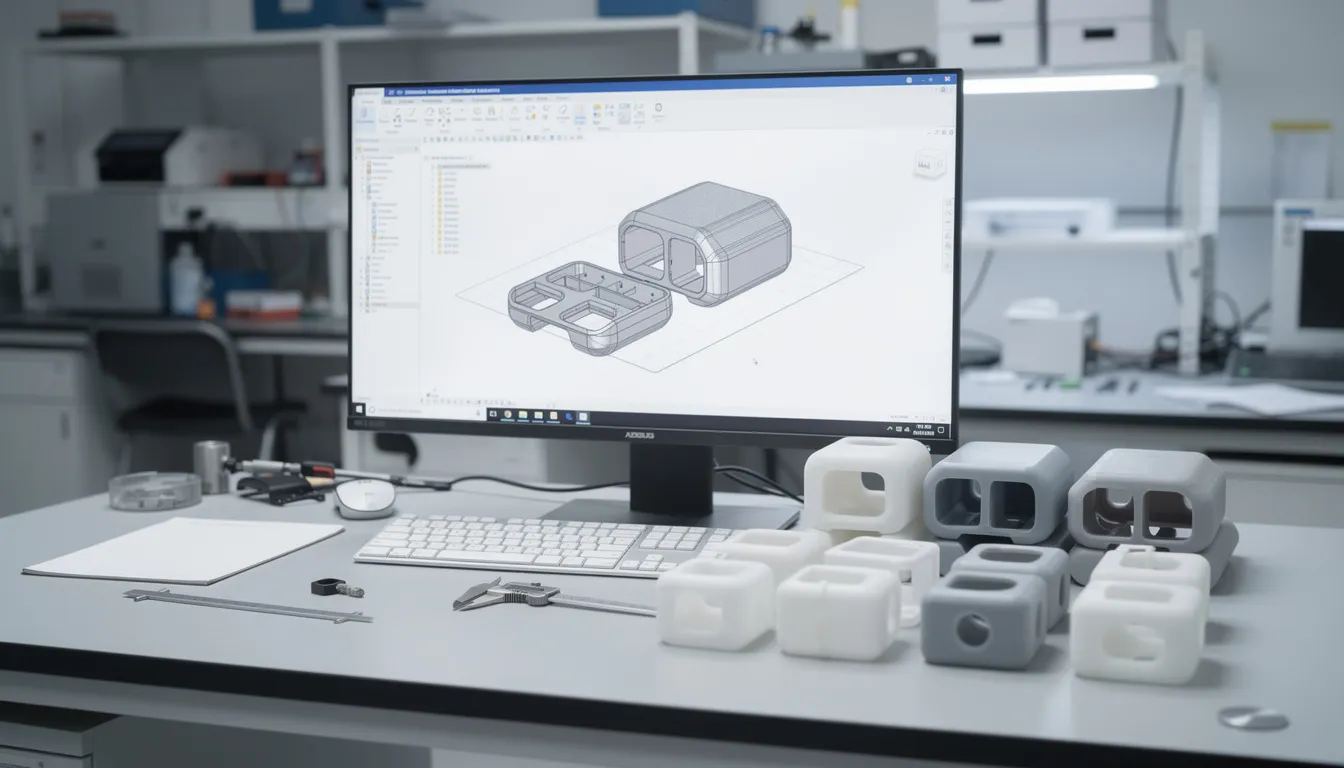
Detailed CAD Development
Engineering teams develop comprehensive 3D models covering:
- Mechanical structures: Enclosures, mechanisms, connectors
- Electronics: PCB layouts, sensor integration, power systems
- Software architecture: Firmware, user interface, data handling
For a diagnostic imaging device, this includes designing the optical system, sensor mounts, and user interface components.
Design for X Principles
Development integrates critical “Design for X” principles from the start:
- Design for Manufacturing (DFM): Ensuring parts can be cost-effectively produced via injection molding, CNC machining, or sheet metal fabrication
- Design for Assembly (DFA): Minimizing assembly steps and potential for operator error
- Design for Service: Enabling field maintenance and component replacement
Expert insights show that integrating DFM at this stage reduces downstream costs by up to 25%. Non-optimized designs often require 20-30% redesign during manufacturing transfer.
Human Factors Engineering
FDA guidance requires demonstrating that devices support safe, effective use. This means:
- Intuitive operation sequences
- Ergonomic controls and displays
- Clear feedback mechanisms to prevent user errors
A human-centered design approach ensures that usability testing happens continuously, not just at the end.
Leveraging Rapid Prototyping
In-house rapid prototyping supports dozens of mechanical iterations:
- Optical fixtures for alignment validation
- Ergonomic grip variations
- Assembly jigs and test fixtures
This accelerates design cycles from weeks to days, keeping the overall development process on track.
Controlled Design Outputs
This phase produces formal design outputs under ISO 13485-compliant document management:
- Engineering drawings with GD&T tolerances
- Bill of Materials (BOM)
- Software requirements
- Preliminary manufacturing process flows
- Technical documentation for regulatory submission
Transition: With detailed designs in place, the next phase is to refine, verify, and test prototypes to ensure they meet all requirements.
Phase 3 – Refinement, Verification, and Preclinical Testing
Overview
Phase 3 (typically 6–12 months) subjects prototypes to rigorous testing, refining designs until they meet specifications and user needs.
Building Verification Prototypes
Teams construct engineering verification test (EVT) and design verification test (DVT) prototypes using:
- 3D-printed components for rapid iteration
- Machined parts approximating final materials
- Representative electronics and software
Multiple prototype builds may be necessary before the design freeze.
Bench Testing and Preclinical Research
Each device type requires specific validation:
| Device | Key Verification Tests |
|---|---|
| Diagnostic Device | Image resolution, signal-to-noise ratio, temperature stability |
| Infusion Pump | Flow rate accuracy, alarm functionality, battery life |
| Preclinical research may include animal models or simulated-use testing for devices requiring in vivo safety data. |
Design Traceability Matrix
Regulatory agencies expect clear traceability linking:
- User needs → What clinicians require
- Design inputs → Engineering specifications derived from needs
- Design outputs → Drawings, code, components meeting inputs
- Design verification → Test protocols proving outputs meet inputs
- Results → Documented evidence of compliance
This traceability matrix becomes central to your 510(k) or PMA submission.
Iterative Usability Studies
Clinical evaluation continues throughout this phase. Teams conduct usability testing with representative users:
- Observing clinical staff running through typical scenarios
- Capturing errors, confusion, or near-misses
- Updating labeling and software UI based on findings
- Validating that training materials support correct use
Accelerating Iteration Cycles
When usability studies reveal issues with ergonomic elements or housing geometry, rapid prototyping enables quick modifications. What might take weeks through traditional manufacturing happens in days, keeping the overall development process on track.
Transition: Once prototypes are verified and refined, the next step is to validate the device in real-world conditions and prepare for regulatory submission and manufacturing transfer.
Phase 4 – Validation, FDA Pathways, and Manufacturing Transfer
Overview
Phase 4 proves the device in its intended use environment and prepares for scale manufacturing and regulatory approval.
Understanding US Regulatory Pathways
The device’s classification determines your path to market:
| Pathway | Typical Use | Timeline | Example Devices |
|---|---|---|---|
| 510(k) | Devices substantially equivalent to predicates | 6-9 months FDA review | Diagnostic imaging devices, infusion pumps |
| De Novo | Novel low-to-moderate risk devices without predicates | 9-12 months | New diagnostic platforms |
| PMA | High-risk devices | 12-18 months | Implantable devices |
- 510(k): Demonstrates substantial equivalence to a predicate device.
- De Novo: For novel devices with no predicate, moderate risk.
- PMA: Requires clinical data and is used for high-risk devices.
Note: Early regulatory strategy development is critical, as requirements vary significantly between pathways—especially in fields that rely on innovative design solutions.
Phase 4 Validation Activities
Validation confirms the medical device meets user needs in real-world conditions and can be further enhanced by implementing DFM Optimization practices:
- Human factors validation: Summative usability studies per FDA guidance
- Clinical or simulated-use studies: Performance in representative environments
- Labeling validation: Confirming Instructions for Use support safe, effective use
Compiling Submission Packages
A 510(k) dossier typically includes:
- Device description and intended use
- Substantial equivalence arguments
- Bench test data and performance specifications
- Biocompatibility reports (per ISO 10993)
- Software documentation (for devices with firmware)
- Risk management files (ISO 14971)
- Sterilization validation
- Electrical safety testing results (IEC 60601)
Manufacturing Transfer
Transitioning from prototype builds to pilot manufacturing involves:
- Selecting contract manufacturers aligned with quality system regulation requirements
- Freezing critical dimensions based on validated designs
- Process validation (IQ/OQ/PQ): ensuring manufacturing processes produce consistent, quality products
- Establishing quality control checkpoints for incoming materials, in-process inspection, and final release
Development partners support manufacturing transfer by delivering robust CAD, DFM-optimized part designs, and production fixtures created via rapid prototyping. This ensures smoother handoffs and fewer surprises during scale-up.
Transition: With regulatory clearance and manufacturing processes in place, the device is ready for production, launch, and ongoing post-market activities.
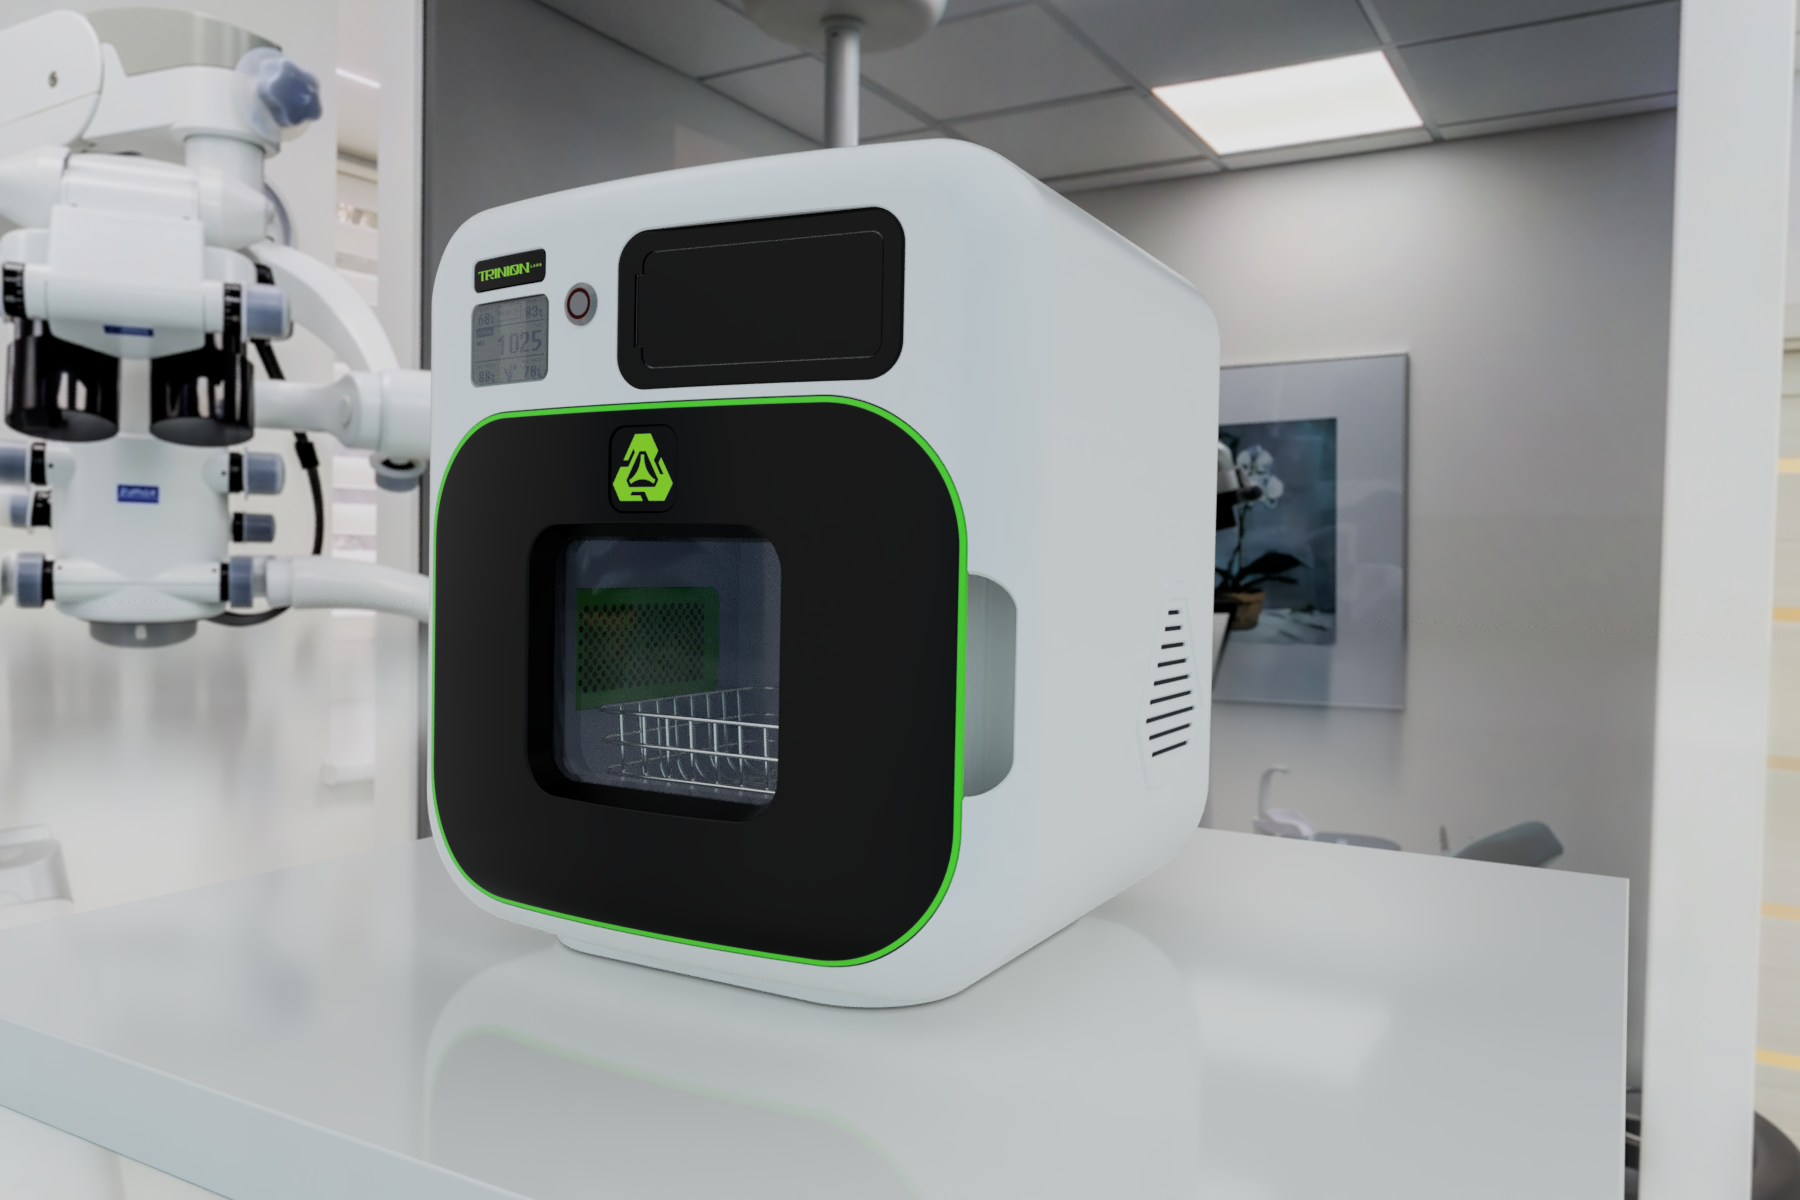
Phase 5 – Production, Launch, and Post-Market Surveillance
Overview
With FDA clearance in hand, the device enters the US market—but responsibilities continue.
Ramping Up Production
Scaling from pilot runs to full production requires:
- Coordinating with suppliers for medical-grade materials
- Establishing incoming inspection protocols
- Implementing in-process quality control checks
- Setting up final QC and release testing
- Managing documentation and lot traceability
Launch Planning
Successful market introduction means:
- Distributor coordination: working with group purchasing organizations and hospital systems
- Training programs: educating clinicians, nurses, and technicians on proper use
- Marketing materials: clinical data sheets, competitive positioning, ROI calculators
Post-Market Surveillance Obligations
US regulatory agencies require ongoing vigilance:
| Obligation | Description |
|---|---|
| Complaint handling | Systematic capture and investigation of customer issues |
| Medical Device Reporting (MDR) | Mandatory reporting of adverse events to FDA’s MAUDE database |
| CAPA management | Corrective and preventive actions for identified problems |
| Post market surveillance plans | Ongoing monitoring of device’s performance in the field |
- CAPA: Corrective and Preventive Action, a process for addressing and preventing quality issues.
- MDR: Medical Device Reporting, required for adverse events.
Supporting Post-Launch Evolution
Development partners continue supporting clients after launch:
- Rapid prototyping for updated components or accessories
- Design iterations based on field feedback
- Re-validation support for design changes
- Next-generation product development using collected real-world data
When clinics report improved patient outcomes with a new device, that data collection feeds directly into planning for next-generation products.
Transition: Understanding the challenges that can arise post-launch is essential for long-term success, which leads to the next section on common challenges and how to overcome them.
Common Challenges in Bringing Medical Devices to the US Market
Overview
Even experienced teams encounter obstacles during medical device product development. Understanding common pitfalls helps you avoid them.
Misunderstanding User Needs
Many programs stumble because they:
- Misjudge clinical workflow in US hospitals
- Fail to consider home-care or ambulatory settings
- Ignore cleaning and reprocessing constraints
- Don’t account for variation in training levels among users
Identifying user requirements early through direct observation prevents expensive late-stage redesigns.
Under-Resourced Teams
Small startups with limited engineers often struggle to manage parallel workstreams:
- Design and prototyping
- Verification testing
- QMS documentation
- Regulatory submission preparation
- Supplier qualification
Without sufficient bandwidth, activities slip and development timelines extend.
Limited Regulatory Expertise
Common regulatory mistakes include:
- Misclassifying the device, choosing the wrong pathway
- Underestimating clinical evidence requirements
- Not aligning with current FDA guidance on software, cybersecurity, or human factors
- Missing emerging technologies guidance updates
Regulatory standards evolve constantly. Staying current is vital.
Technical and Manufacturability Issues
Over-engineered designs cause problems during scaling:
- Overcomplicated mechanisms
- Non-moldable geometries requiring expensive tooling
- Material selections incompatible with sterilization methods
- Tolerances too tight for cost-effective manufacturing processes
Studies show that non-DFM designs lead to yield losses during production ramp-up.
Mitigating Risks Through Partnership
Partnering with a development group familiar with engineering and US regulatory expectations can address many challenges before they derail your program. Their experience across multiple disciplines and device types provides valuable insights that internal teams often lack.
Transition: To address these challenges and accelerate development, the next section explains how expert partners support medical device teams throughout the process.
How Expert Partners Accelerate US Medical Device Development
Overview
Experienced development partners combine engineering excellence with deep understanding of FDA pathways.
Proven Experience Across Device Categories
Partners have delivered comprehensive solutions for:
- Diagnostic imaging devices: optical system design, image processing, ergonomic interfaces
- Infusion pumps: flow control, safety interlocks, user-friendly controls
- Implantable devices: biocompatible materials, power management, long-term reliability
Rapid Prototyping Capabilities
Rapid prototyping infrastructure enables:
For projects requiring efficient, high-quality prototyping, consider leveraging DFM Optimization for cost-effective and manufacturable designs.
- Same-week delivery of complex enclosure prototypes
- Rapid iteration of ergonomic controls and grips
- Custom sensor mounts and optical fixtures
- Test jigs and assembly aids
This compresses early design cycles from multiple weeks to just a few days, helping accelerate development across the entire development process.
Integrated Design for Manufacturing
Partners don’t just prototype—they design for scale:
- Evaluating injection molding, sheet metal, CNC, and additive options
- Optimizing designs for supply chains
- Reducing per-unit costs while maintaining quality
- Ensuring biocompatibility requirements are met through proper materials science selection
Regulatory and Quality Alignment
Partners collaborate directly with client regulatory and quality teams to ensure:
- Design outputs meet FDA 21 CFR Part 820 requirements
- Test plans align with predicate comparisons
- Risk documentation satisfies ISO 14971 expectations
- Technical documentation supports successful regulatory compliance
Their experience helps foster innovation while maintaining the rigor that regulatory agencies require.
Get Started Early
The most successful engagements happen when partners join during Phase 0 or Phase 1—early enough to shape requirements, architecture, and DFM from the beginning. However, they can also enter later to support redesigns, verification testing, or manufacturing transfer.
If you’re planning a US medical device program and want to reduce risk while compressing time-to-market, engaging experienced partners early provides a competitive edge that pays dividends throughout development.
FAQs about Developing Medical Devices in the US
The following questions address common concerns not fully covered above, particularly around cost, timelines, and working with development partners.
How long does it typically take to develop a medical device for the US market?
Most devices require 2–5 years from initial concept to market launch. Breaking this down:
- Phase 0-1 (Definition and Concept): 6-12 months
- Phase 2-3 (Development and Verification): 12-24 months
- Phase 4 (Validation and FDA Review): 6-12 months (including 6-9 months for 510(k) review)
- Phase 5 (Scale-up and Launch): 3-6 months
Timelines vary based on device complexity, clinical evidence requirements, and team resources. Teams working with experienced partners often compress this by 20-30%.
What does it cost to bring a new device to market?
Expect to invest several hundred thousand to several million USD depending on device complexity:
- Engineering and prototyping (25-35%)
- Verification and validation testing (20-30%)
- Clinical studies if required (10-40%)
- Tooling and manufacturing setup (15-25%)
- Regulatory submission preparation (5-10%)
Early DFM integration can reduce overall costs by minimizing redesign cycles.
When should we involve a development partner?
Ideally, engage during Phase 0 or Phase 1 when you’re shaping requirements, architecture, and manufacturing strategy. Early involvement ensures DFM principles are embedded from the start, avoiding costly redesigns later.
Partners can also assist at later stages with:
- Redesigns to address verification test failures
- Manufacturing transfer challenges
- Preparing technical documentation for submission
- Accelerating iteration through rapid prototyping
Can rapid prototyping be used for final medical devices?
Rapid prototyping is primarily used for design validation, fixtures, test jigs, and some low-volume components. Most high-volume production parts rely on injection molding, CNC machining, or other traditional manufacturing processes designed for scale.
Certain applications—like patient-specific surgical guides or low-volume complex geometries—increasingly use additive manufacturing for production parts. The key is understanding which approach optimizes cost, quality, and regulatory compliance for your specific device.
Do we still need a full internal engineering team if we work with partners?
Many successful medical device companies keep a lean internal team focused on:
- Clinical vision and user need definition
- Regulatory strategy and FDA interactions
- Quality system oversight
- Commercial planning
They then leverage partners for specialized design engineering, rapid prototyping, DFM optimization, and manufacturing support. This avoids the cost and complexity of building a large in-house staff while still maintaining strategic control over the new product development process. This approach avoids the cost and complexity of building a large in-house team while allowing you to maintain strategic control over the new product development process. Additionally, 3D Design for Manufacturing (DFM) services can assist clients with these critical steps efficiently and affordably, ensuring high-quality outcomes without excessive expenses.
Working with experienced partners also brings cross-industry valuable insights that pure internal teams may lack, particularly for teams entering new device categories or navigating unfamiliar regulatory pathways.
Conclusion
Developing medical devices for the US market is a multi-phase, highly regulated process that requires careful planning, technical expertise, and a clear understanding of regulatory requirements. By following a structured approach and leveraging experienced partners, teams can reduce risk, compress timelines, and increase the likelihood of a successful product launch.